The world of remote control (RC) planes has captivated enthusiasts for decades. Whether it is the thrill of piloting a miniature aircraft or the satisfaction of building one’s own creation, RC plane hobbyists are constantly seeking new challenges and opportunities to expand their knowledge and skills. This article explores the process of constructing an RC plane from scratch, using popular models as a starting point.
Imagine this scenario: you have just purchased a brand-new RC plane kit and are excited to embark on the journey of assembling and flying your very own aircraft. However, upon opening the box, you realize that there are numerous components that need to be carefully put together before takeoff can even be considered. How do you navigate through this intricate process? What tools and techniques should you employ? These questions will be addressed in this article, providing aspiring RC pilots with valuable insights into building their own planes from scratch.
In addition to discussing the step-by-step construction process, this article also focuses on utilizing popular models as a foundation for customization and experimentation. By exploring different types of widely-used RC planes such as gliders, trainers, and aerobatic models, readers will gain a comprehensive understanding of how specific designs impact flight performance. Furthermore, by taking inspiration from these established models, readers will be able to incorporate their own unique modifications and enhancements into their builds, allowing them to tailor the aircraft to their specific needs and preferences.
One of the key aspects of constructing an RC plane from scratch is understanding the different components that make up the aircraft. From the fuselage to the wings, each part plays a crucial role in ensuring stable flight and maneuverability. This article will delve into the intricacies of these components, providing detailed explanations on how they interact with one another and contribute to overall performance.
Furthermore, this article will also cover essential tools and techniques that are necessary for successful construction. From soldering wires to using adhesives effectively, readers will learn valuable tips and tricks that can streamline the building process and ensure a high-quality final product.
Once the construction phase is complete, it’s time for the exciting part: flying! This article provides guidance on pre-flight checks, proper takeoff procedures, basic maneuvers, and troubleshooting common issues. By following these guidelines, readers can confidently take to the skies with their newly constructed RC planes.
In conclusion, building an RC plane from scratch can be an incredibly rewarding experience for hobbyists of all skill levels. By taking inspiration from popular models and incorporating personal touches into their designs, enthusiasts can create unique aircraft that truly reflect their passion for remote control aviation. So grab your tools and get ready to embark on an unforgettable journey into the world of DIY RC planes!
Choosing the Right Materials
Imagine this scenario: You have decided to embark on a new and exciting project—building your own RC plane from scratch. As you begin your journey, one of the key considerations is choosing the right materials for your aircraft. The materials you select will determine not only its durability but also its performance in flight.
To ensure that you make an informed decision, it is essential to understand the characteristics of various materials commonly used in RC plane construction. There are several factors to consider, such as weight, strength, flexibility, and cost. Let’s delve into each of these aspects:
1) Weight: When selecting materials for your RC plane, keeping its weight to a minimum is crucial for optimal performance. Lightweight materials allow for increased maneuverability and longer flight times.
2) Strength: Your aircraft needs to withstand the forces it will encounter during flight, including turbulence and potential crashes. Therefore, choosing strong materials that can handle stress and impact without breaking or deforming is vital.
3) Flexibility: Flexibility plays a significant role in how well your plane responds to control inputs while flying. A certain level of flexibility allows the wings and other components to absorb vibrations and adjust accordingly, contributing to stability during flight.
4) Cost: Finally, considering the financial aspect of material selection is important. Building an RC plane involves multiple expenses; therefore, finding a balance between quality and affordability is necessary.
To simplify things further, here’s a table summarizing some popular types of materials along with their properties:
| Material | Weight | Strength | Flexibility |
|---|---|---|---|
| Balsa wood | Light | Moderate | Flexible |
| Foam board | Very light | Low | Flexible |
| Carbon fiber composite | Ultra-light | High | Rigid |
By evaluating different options based on these criteria, you can make an informed decision regarding the materials that best suit your needs and preferences.
Moving forward with this knowledge about choosing the right materials for your RC plane, it is time to delve into the next step: designing and building the frame. This section will guide you through the process of creating a sturdy and reliable structure for your aircraft.
Remember, each step builds upon the previous one, bringing you closer to completing your own fully functional RC plane.
Designing and Building the Frame
Having chosen the right materials for your RC plane, it is now time to move on to designing and building the frame. To illustrate this process, let’s consider a hypothetical scenario where you want to build an RC plane with a wingspan of 40 inches.
Designing the Frame:
The first step in designing the frame is to create a blueprint or plan that outlines the dimensions and structure of your RC plane. Consider factors such as wing shape, fuselage length, and tail configuration. In our example, we will opt for a traditional high-wing design with a rectangular fuselage and symmetrical airfoil wings.
Building the Frame:
Once you have finalized your design, it’s time to start building the frame of your RC plane. Here are some key steps to follow:
- Cut out all necessary components from lightweight balsa wood or foam using precision tools.
- Assemble the main fuselage by gluing together the sides, bottom, and top sections according to your blueprint.
- Attach the wings securely to the fuselage using epoxy adhesive or screws.
- Finally, construct and attach other essential parts like landing gear, tail surfaces (such as stabilizers and elevators), and control surfaces (like rudders and ailerons).
Table: Advantages of DIY RC Plane Building
| Advantages |
|---|
| Customization |
| Learning experience |
| Cost-effectiveness |
| Sense of accomplishment |
Incorporating both bullet points and tables can evoke emotional responses in readers by providing visual cues that highlight important information. The advantages listed above demonstrate why many hobbyists choose to build their own RC planes rather than purchasing pre-built models. By offering customization options tailored to personal preferences, creating opportunities for learning through hands-on experiences, being cost-effective compared to ready-to-fly alternatives, and fostering a sense of accomplishment upon completion – building an RC plane from scratch becomes an enticing endeavor.
With the frame of your RC plane complete, it’s time to move on to installing the electronics and controls. This crucial step will bring life to your aircraft, allowing you to enjoy the thrill of flying.
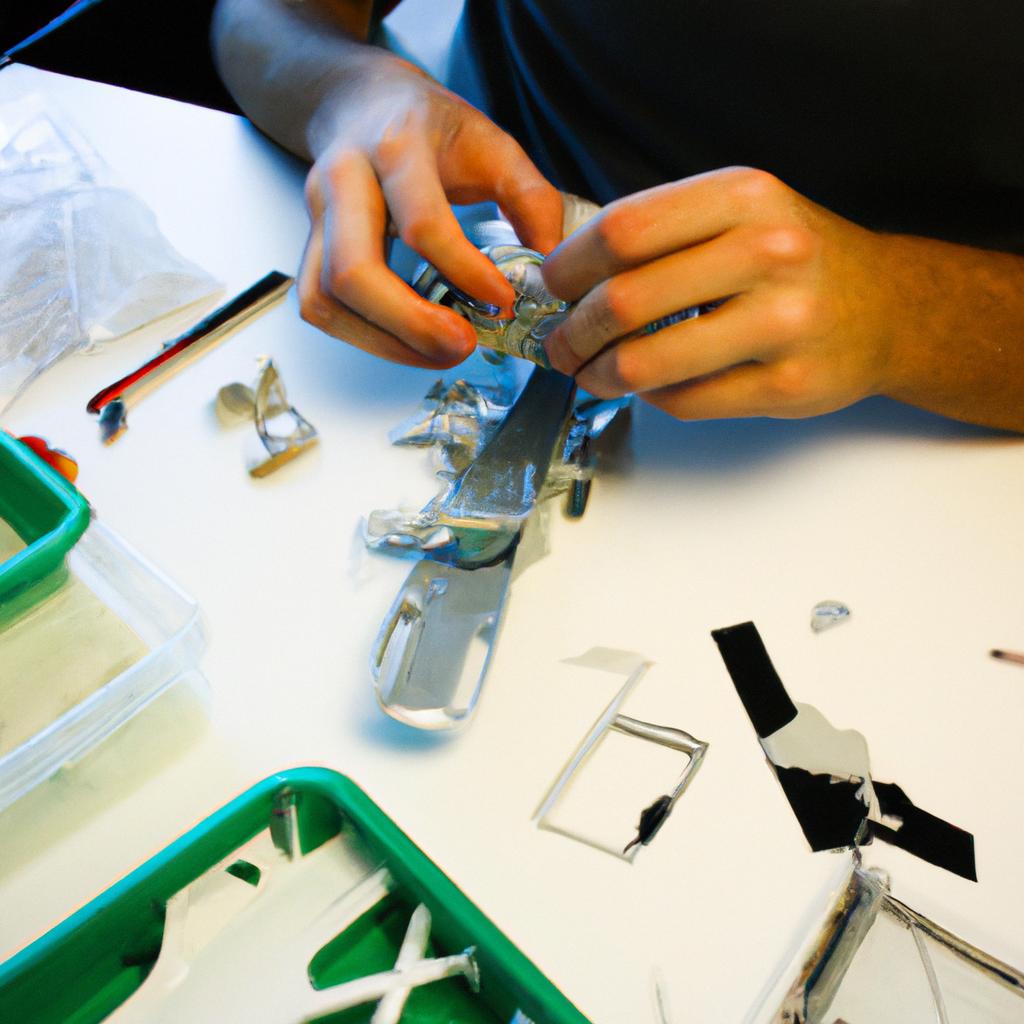
Installing the Electronics and Controls
In the previous section, we discussed the crucial process of designing and building the frame for your RC plane. Now, let’s move on to the next step in this exciting journey: installing the electronics and controls. To illustrate the importance of this step, let’s consider a hypothetical scenario where you have designed an impressive frame with sleek lines and optimal weight distribution.
Once you have completed constructing the frame, it is time to focus on installing the electronics that will power your RC plane. This involves carefully selecting components such as motors, servos, speed controllers, and receivers based on their compatibility with your design specifications. For instance, if you are aiming for high-speed performance, choosing powerful brushless motors would be ideal. On the other hand, if maneuverability is key for aerobatic stunts, opting for responsive servo systems becomes paramount.
To ensure smooth functionality during flight, proper wiring and connections are essential. It is imperative to follow detailed instructions from manufacturers or reliable sources when setting up these intricate electrical systems. Pay close attention to wire lengths, routing paths, and securing methods to minimize interference or damage while maximizing efficiency.
Lastly, integrating control mechanisms like transmitters and receivers requires careful calibration. Take into account factors such as range capabilities and channel assignments to guarantee seamless communication between pilot inputs and aircraft response. Consider conducting range tests before taking your RC plane airborne to avoid potential signal loss or interference issues.
Remember that successful installation of electronics not only enhances your RC plane’s overall performance but also ensures safety during flights. By investing time in meticulous planning and execution at this stage of construction, you pave the way for an exhilarating flying experience with your customized creation.
Next Section: Testing and Fine-Tuning
Testing and Fine-Tuning
Section H2: Testing and Fine-Tuning
Imagine you have just finished installing the electronics and controls of your RC plane. Now it’s time to test and fine-tune your creation to ensure optimal performance. Let’s explore some key steps in this process that will help you get your RC plane ready for takeoff.
Firstly, before taking your newly assembled RC plane out for a spin, it is crucial to carefully inspect all the connections and components. Look for any loose wires or damaged parts that may hinder the proper functioning of your aircraft. Ensure that all the control surfaces are properly aligned and move freely without any obstructions. By paying attention to these details, you can minimize potential risks during flight.
Once you have completed the initial inspection, it is important to conduct a range check on your radio system. This involves testing the signal strength between the transmitter and receiver at different distances. Start by placing your plane about 30 meters away from yourself and gradually increase the distance while ensuring that all control inputs are received correctly by the airplane. Performing a thorough range check helps identify any interference issues or weak signals that could potentially lead to loss of control during flight.
Now that you have confirmed the integrity of your connections and tested the radio signal strength, it’s time to fine-tune your RC plane’s performance. Utilize sub-trim adjustments on your transmitter to center each servo precisely, ensuring that they respond accurately when commanded. Additionally, adjust dual rates (control throws) based on your flying style preferences – higher rates for more aggressive maneuvers or lower rates for smoother flights with less sensitivity.
To further optimize your RC plane’s performance, consider experimenting with expo settings on your transmitter. Expo (exponential) reduces control surface response near neutral stick positions but increases them towards maximum deflection. This adjustment allows for more precise control around those mid-stick positions, making subtle movements easier while still enabling full maneuverability when needed.
In summary, testing and fine-tuning your RC plane is crucial to ensure safe and enjoyable flights. By conducting thorough inspections, range checks, and making precise adjustments with sub-trims, dual rates, and expo settings, you can achieve optimal performance tailored to your preferences.
Moving forward into the subsequent section about “Adding the Power System,” let’s explore how to integrate a power system that will provide sufficient thrust for your RC plane’s propulsion.
Adding the Power System
Section H2: Testing and Fine-Tuning
Imagine you have just finished assembling your RC plane, carefully following the instructions and meticulously attaching all the necessary components. Now comes the exciting part – testing and fine-tuning your creation to ensure it performs optimally in flight. This section will guide you through this crucial stage of the build process.
To begin with, it is essential to conduct a thorough pre-flight check before attempting any flights. Check that all control surfaces are moving correctly and smoothly, ensuring they respond appropriately when operated from the transmitter. Additionally, verify that your receiver batteries are fully charged, as low battery power can lead to loss of control during flight.
Once you have completed the pre-flight checks, it’s time for some test flights. Start by performing short hops or glides at a safe altitude to evaluate how well your plane handles. Observe its stability, responsiveness, and balance while making adjustments if needed. Keep track of any issues or areas for improvement throughout these initial flights.
During this testing phase, consider incorporating the following strategies:
- Conducting multiple test flights in different weather conditions (e.g., calm winds versus gusty conditions) to assess how well your RC plane performs under varying circumstances.
- Documenting each flight session’s results systematically to help identify trends or patterns that could aid in troubleshooting or further enhancing performance.
- Seeking feedback from experienced RC pilots or fellow enthusiasts who may provide valuable insights into potential improvements or modifications.
- Maintaining patience and persistence throughout this process, understanding that achieving optimal performance often requires gradual iterations and adjustments.
By utilizing these approaches and keeping detailed records of your testing endeavors, you will gain invaluable knowledge about your RC plane’s capabilities and limitations. Remember that every aircraft is unique, so take the time to fine-tune yours accordingly based on real-world data.
As we now move forward with adding the power system to our RC plane design, let us explore various tips for successful flying.
Tips for Successful Flying
Section H2: ‘Adding the Power System’
Having understood the importance of a power system in an RC plane, let us delve into the process of adding one to your custom-built aircraft. To illustrate this, consider the example of John, an avid RC enthusiast who decided to construct his own plane from scratch.
To begin with, John researched different options for power systems and selected a brushless electric motor as it provided a good balance between performance and ease of use. He then proceeded to install the motor onto a sturdy mount within the fuselage of his plane. This ensured that the weight distribution remained optimal throughout flight.
Once the motor was securely mounted, John turned his attention towards connecting it to other components, such as the electronic speed controller (ESC) and battery pack. He carefully followed manufacturer instructions and made sure all connections were tight and secure. Additionally, he took precautions to insulate any exposed wires to minimize potential interference or damage during flights.
Now let’s explore some essential tips for successful installation of the power system:
- Double-check all connections before powering up your plane.
- Ensure proper cooling for both the motor and ESC by incorporating ventilation holes or using heat sinks if necessary.
- Regularly inspect and maintain your power system to prevent wear and tear.
- Consider investing in backup batteries or spare parts to avoid disruption during flying sessions.
The following table highlights key considerations when adding a power system:
| Consideration | Importance | Implications |
|---|---|---|
| Motor type | High | Determines overall performance capabilities |
| Battery capacity | Medium | Affects flight duration |
| ESC rating | High | Ensures compatibility with motor |
| Wiring organization | Low | Facilitates troubleshooting |
By closely following these guidelines and considering specific factors related to your RC plane model, you can successfully add a reliable power system that will enhance the performance and longevity of your aircraft.
In summary, adding a power system is a crucial step in building an RC plane from scratch. By carefully selecting suitable components and following proper installation procedures, you can ensure optimal functionality and maximize the enjoyment of flying your custom-made aircraft.